


Changelog – See What’s New!
Click here to view the entire changelog.
How to Order
You can order a copy of the software from the official website: Creative Bear Tech. To order your copy of the software, simply check out and the software along with the licence key will be available in your members’ area. All future updates will be uploaded inside your members’ area. Please note: normally, the licence key and your username should be issued to your automatically by the system and should be accessible in your member area. However, in the event that your licence key is not issued automatically, please contact us Please allow at least 24 hours for us to get back to you. Thank you!

Support
For support questions, please contact us , add us on skype and join our forum where you can post your questions and get support from our developers and community.
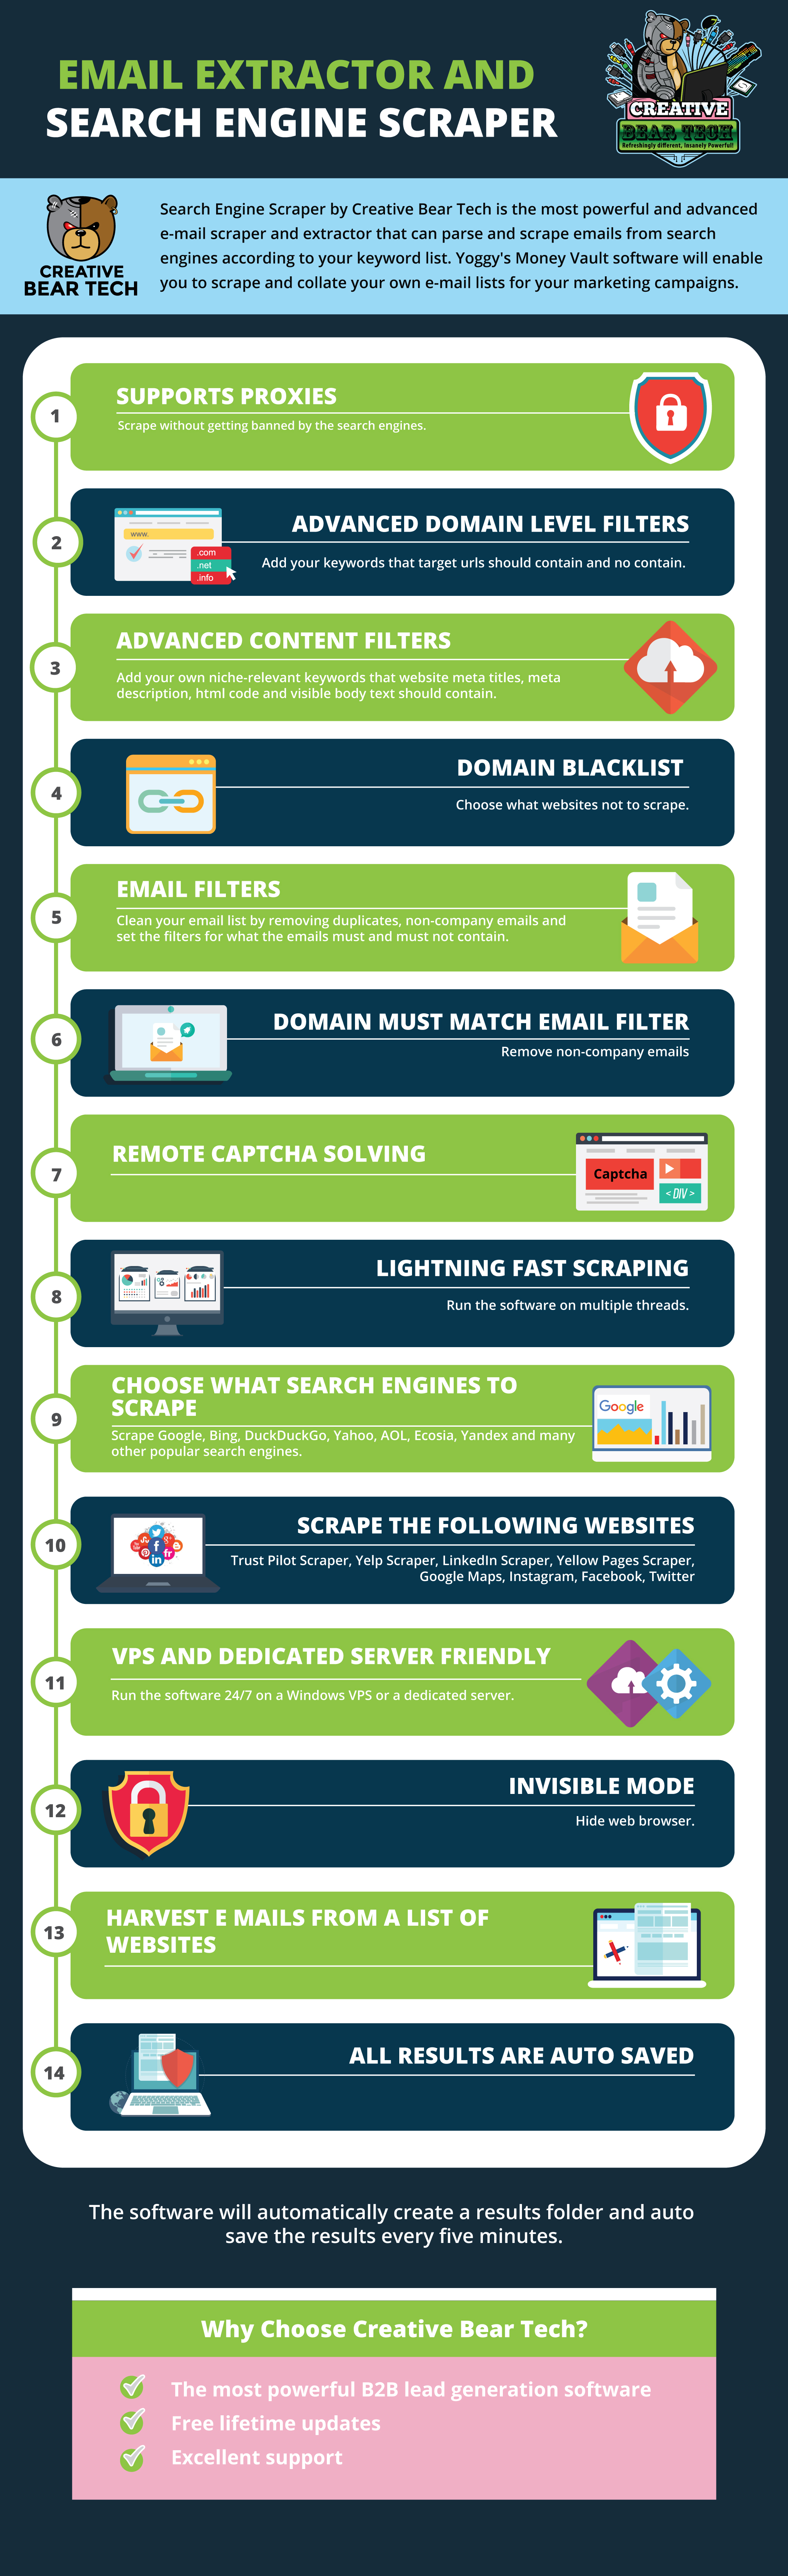
In this guide, we will be giving you a full walkthrough of how to use Email Extractor and Search Engine Scraper By Creative Bear Tech. This guide will be divided into sections and will follow in a logic sequence.
Full Tutorial of Search Engine Scraper and Email Extractor by Creative Bear Tech
IMPORTANT: PLEASE FOLLOW THESE STEPS BEFORE RUNNING THE SOFTWARE
Extract the software files using .rar extraction software. Then go to folder “1.1.1” right click on it and select “Properties”. Then, you will need to uncheck the box “Read-only” and click on “Apply”. This action needs to be performed in order to give the website scraper full writing permissions.
Allow The Website Scraper through Windows Firewall
Sometimes, Windows Defender and other Anti-Virus software may block the website scraper as it may be seen as a virus because it performs automated tasks. You will need to add the software application file to your list of allowed files. Go to Windows search and type in “Allow an app through Windows Firewall”. This should take you to this folder: Control Panel\System and Security\Windows Defender Firewall\Allowed apps Now click on “Change Settings” and then select “Allow another app” and navigate to the folder where your software is saved an select the main application file.
1 How to Run the Search Engine Scraper By Creative Bear Tech
If you are running the software on your laptop or in a very stable environment, you can run the “CreativeBearTech” exe file by double clicking on it. Alternatively, you can run the “CreativeBearTechManager” exe file if you are running your software on a VPS or a dedicated server. The “CreativeBearTechManager” exe file will automatically restart the software in case it crashes. It is recommended that you run this file. Please note, two windows will open: a black command screen and the software. Please keep both applications open.

1 a) Running the CreativeBearTechManager Exe File.
2 Activating your Licence for the Search Engine Scraper
When you have purchased your copy of the Email Extractor and Search Engine Scraper by Creative Bear Tech, you should have received a username and a licence key. This licence key will allow you to run the software on one machine. Your copy of the software will be tied to your MAC address.
Go to “More Settings” and at the bottom left hand side corner, click on “License” button. You will now need to enter your username and license key. Once the registration is successful, you will see a green message reading “The app is licensed“. At the right hand side bottom of the main GUI, you will also see a writing that you are running a “Registered Version“.

2 a) Check for Updates
Click on the “Check Update” button in the top right hand side corner to check and install the latest updates. In case new updates are installed, the software will ask you to restart.
3 Name your Project
On the main GUI, at the top left hand side, just under “Search Settings”, you will see a field called “Project Name“. Please enter a name for your project. This name will be used to create a folder where your scraped data will be stored and will also be used as the name of the file. I usually like to have a representative project name. For example, if I am scraping cryptocurrency and blockchain data, I would have a project name along the lines of “Cryptocurrency and Blockchain Database“.

4 Specify the Folder path where the Scraped Data Should be Saved
Click on the “More Settings” button and go to “Save & Login Details” tab. You will need to select a folder on your computer where the results should be exported. Usually, it is a good idea to create a folder inside the software folder. I usually like to create a folder called “Scraped Data”. The software will automatically use the project name to create a separate folder (using the project name). Inside that folder, the results will be exported in an Excel .csv file. The Excel file will have the same name as the project name. For example, if my project name is “Cryptocurrency and Blockchain Database” then my folder and the file will be named
“Cryptocurrency and Blockchain Database“.

5 Configure your Proxy Settings
The next step will be to configure your proxies. You can still run the website scraper without proxies. However, if you are planning to do a lot of scraping using multiple sources and threads, it is recommended that you get some proxies. Click on “More Settings” button on the main graphical user interface (GUI) and click on the first tab “Proxy Settings“. Inside the input pane, you will need to add your proxies, one per line, in the following format: IP address:Port:Username:Password Once you have entered you proxies, you can use the in-built proxy tester tool by click on the button “Test the proxies and remove if not working“. The software will automatically test your proxies and remove non-working ones. I highly recommend that you get your proxies from
https://stormproxies.com or https://hashcell.com/ Private dedicated proxies are best. Do not even waste your time with public proxies as they are quite unreliable for scraping. It is recommended that you rotate your proxies every minute so that they do not get blacklisted. You can paste the proxies directly in the text input pane or upload them from file.
5 (b) A timed out VPN is an alternative to proxies (not recommended)
Instead of using proxies, you can also use VPN software such as Hide My Ass VPN! You would need to use the previous version that has a timed out IP change. This means that the VPN software will change the IP address every given number of minutes and seconds. You can even choose your countries. However, the problem with the VPNs is that sometimes they disconnect and stop working. This can interrupt the scraping. VPN proxies tend to be quite overused and blacklisted with the popular search engines such as Google. I thought I would cover this alternative for the sake of completeness, but I would not recommend it.

6 Configure remote Captcha Solving Service
Sometimes, when running the search engine scraper for prolonged periods of time, certain IP addresses may get blacklisted and you would need to solve the captcha (Google image captchas and text captchas). The website scraper has an integrated remote captcha solving service called 2captcha. You will need to create an account on https://2captcha.com/ and get your API key and paste it into the “API Key” box. You can click on “Get balance” button to see if your software has connected to 2captcha successfully. Captcha is not vital if you have configured the delay settings properly, but it is recommended to have it to avoid IP bans and interruptions (especially if you are not using proxies).

6 (b) Configure XEvil by Botmaster Labs to Solve Captchas for Free
You can use Xrumer and XEvil to solve the captchas for free. It is one of the most advanced captcha solving software that can solve even Google image captchas. You can read more about XEvil at http://www.botmasterlabs.net/
6 (c) How to Connect XEvil to the Search Engine Scraper by Creative Bear Tech
Go to XEvil and under the “Settings” tab, select “2captcha” then go to the “Captcha Settings” tab in the Search Engine Scraper by Creative Bear Tech, enter a random key (any length) and hit the “check balance” button. You should see a success message saying that your balance is 100. This means that your software is connected to XEvil. Under the settings tab, you will also see a code with your API key in this format: “21/05/2019 12:32:58: GET /res.php?key=70902597a9c4b9c4232926ac63395c5d&action=getbalance&json=0”. This basically means that the Search Engine Scraper has connected to XEvil.
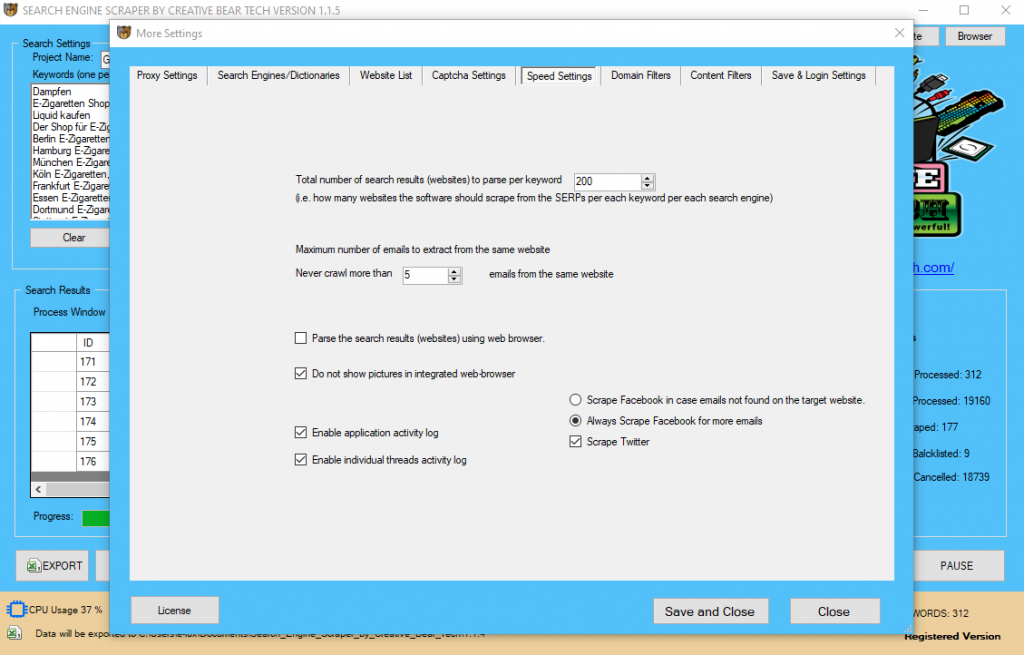
7 Configuring your Speed Settings
Click on “More Settings” on the main GUI and then click on the “Speed Settings” tab. Under this tab, you will be able to set how deep the software should scrape, which will impact on the scraping speed, hence the name. The first option is the “Total number of search results (websites) to parse per keyword“. This just means how many search results the software should scrape per search. For example, when you search for something on Bing or Google search engines, you can go all the way up to page 20 or even further. Usually, 200 results/websites per keyword search are enough. You also have the option to tell the software “Maximum number of emails to extract from the same website“. Sometimes, a website will have more than one email address (i.e. info@, hello@, sales@, etc). You can tell the software how many emails to scrape. Usually, a couple is enough. “Do not show pictures in integrated web-browser“. This option is meant to save time and processing power by not loading the pictures from websites as those are not needed for our scraping endeavours. You also have the option to “parse the search results (websites) using web browser” which just means that the scraper will work at a single thread and you will be able to view the live scraping. You will not be able to use multi-threading options or hide the browser. This option is ideal if you want to see how the software works. I do not use this option.

8 Choose what Search Engines Or Websites to Scrape: Google, Bing, DuckDuckGo!, AOL, Yahoo, Yandex, Google Maps, Yellow Pages, Yelp, Linked In, Trust Pilot
The next step is for you to choose what search engines or websites to scrape. Go to “More Settings” on the main GUI and then head to “Search Engines/Dictionaries” tab. On the left hand side, you will see a list of different search engines and websites that you can scrape. To add a search engine or a website simply check on each one and the selected search engines and/or websites will appear on the right hand side.

ASK Search Engine Scraping Software and Email Extractor by Creative Bear Tech
Yandex Russian Website Scraper and Email Extractor by Creative Bear Tech
Yahoo Website Scraping Software and Email Extractor by Creative Bear Tech
SO Chinese Search Engine Harvester and Email Extractor by Creative Bear Tech
Ecosia Search Engine Scraper and Email Extractor by Creative Bear Tech
AOL Search Engine Scraper and Email Extractor by Creative Bear Tech
YELP Business Directory Scraper Software and Email Extraction Tool by Creative Bear Tech
DuckDuckGo Search Engine Results Scraper and Email Extraction Software
UK Yellow Pages Scraper by Creative Bear Tech
Google Search Engine Scraping Software and Email Extractor Tool
Google Maps Scraping Software and Email Extractor
Bing Search Engine Scraper and Email Extraction Software
Website Scraper and Email Extraction Software
Yellow Pages Scraper and Extractor Software for USA (yell.com)
8 b) Local Scraping Settings for Local Lead Generation
Inside the same tab, “Search Engines/Dictionaries”, on the left hand side, you can expand some websites by double clicking on the plus sign next to them. This is going to open up a list of countries/cities which will allow you to scrape local leads. For example, you can expand Google Maps and select the relevant country. Likewise, you can expand Google and Bing and select a local search engine such as Google.co.uk. Otherwise, if you do not select a local search engine, the software will run international search, which are still fine.
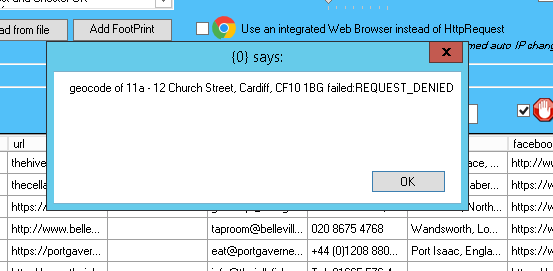
8 c) Special Instructions for Scraping Google Maps and Footprint Configuration
Google Maps scraping is slightly different to scraping the search engines and other sites. Google Maps contains a lot of local businesses and sometimes it is not enough to search for a business category in one city. For example, if I am searching for “beauty salon in London”, this search will only return me just under a hundred results which is not representative of the total number of beauty salons in London. Google Maps provides data on the basis of very targeted post code / town searches. It is therefore very important to use proper footprints for local businesses in order to get the most comprehensive set of results. If you are only searching for all beauty salons in London, you would want to get a list of all the towns in London along with their post codes and then add your keyword to each town and post code. On the Main GUI, enter one keyword. In our case, it would be, “beauty salon”. Then click on the “Add FootPrint” button. Inside, you need to “Add the footprints or sub-areas“. Inside the software, there are some footprints for some countries that you can use. Once you have uploaded your footprints, select the sources on the right hand side. The software will take your root keywords and add it to every single footprint / area. In our case, we would be running 20,000+ searches for beauty salon in different areas in the UK. This is perhaps the most comprehensive way of running Google Maps scraping searches. It takes longer but it is definitely the mot effective method. Please also note that Google Maps can only run on one thread as Google bans proxies very fast. I also highly recommend that you run Google Maps searches separately from search engine and other website searches simply because Google maps is comprehensive enough and you would not want to run the same detailed search with thousands of footprints say on Google or Bing! TIP: You should only be using footprints for Google maps. You do not need to run such detailed searches with the search engines.

9 Scraping your own Website List
Perhaps you have your own list of websites that you have created using Scrapebox or any other type of software and you would like to parse them for contact details. You will need to go to “More Settings” on the main GUI and navigate to the tab titled “Website List“. Make sure that your list of websites is saved locally in a .txt notepad file with one url per line (no separators). Select your website list source by specifying the location of the file. You will then need to split up the file. I recommend to split your master list of websites into files of 100 websites per file. The software will do all the splitting automatically. The reason why it is important to split up larger files is to allow the software to run at multiple threads and process all the websites much faster.

10 Configuring the Domain Filters
The next step is to configure the domain name filters. Go to “More Settings” on the main interface, then select the “Domain Filters” tab. The first column should contain a list of keywords that the url must contain and the second column should contain a list of keywords that the URL should NOT contain. You have to enter one keyword per line, no separators. In essence, what we are doing here is narrowing down the relevancy of the results. For example, if I am searching for cryptocurrency websites, then I would add the following keywords to the first column:
- Crypto
- Cryptocurrency
- Coin
- Blockchain
- Wallet
- ICO
- Coins
- Bit
- Bitcoin
- Mining
Most websites will contain these words in the url. However, the domain filter MUST CONTAIN column presupposes that you know your niche quite well. For some niches, it is fairly easy to come up with a list of keywords. Others may be more tricky. In the second column, you can enter the keywords and website extensions that the software should avoid. These are the keywords that are guaranteed to be spammy. We are constantly working on expanding our list of spam keywords. The third column contains a list of blacklisted sites that should not be scraped. Most of the time, this will include massive sites from which you cannot extract value. Some people prefer to add all the sites that are in the Majestic million. I think that it is enough to add the sites that will definitely not pass you any value. Ultimately, it is a judgement call as to what you want and do not want to scrape.

11 Configuring the Content Filters
The limitation with the domain filters discussed above is that not every website will necessarily contain your keywords. For example, there are many brands that do not necessarily contain the keywords in the domain. This is where the “Content Filter” comes in. The role of the content filter is to check a website’s meta title, meta description and if you wish, the html code and the visible body text. By default, the software will only scan the meta title and meta description of each website and check whether it contains your keyword. Additionally, you can also get the software to check the body text and html code for your keywords as well. However, this will produce very expansive results which may be less relevant. You can also tell the software to check and scrape websites that contain a certain number of your keywords (you can specify it). The idea behind this content filter is that it will only scrape websites that contain your keywords in the meta title and description. Usually, all relevant websites will contain your keywords in the meta fields. So if you choose to search the meta title, meta description and the html code and visible text for your keywords, the software will scrape a website if it contains your keywords in either of the places. It is recommended that you spend some time thinking about your keywords. You should also decide whether you would like to use the domain filters and content filters. Generally, it is quite enough to use one set of filters. I usually go just for the content filters. This content filter is what makes this email extractor and search engine scraper the most powerful scraping tool on the market.
12(a) Configuring the Main Settings in the Main Interface
Enter your project name, keywords and then select “Crawl and Scrape E-Mails from Search Engines” or “Scrape E-Mails from your Website List“. If you are doing both, you can select both options. Otherwise, most people would select the former option. Select “Use Proxies” if you are going to use proxies. You can select “Invisible Mode” if you do not want the software to open the browser windows. As the software performs data scraping inside browser windows, it would normally bring the browser windows up and you could see the entire scraping process in real time view. However, most people prefer to hide the browser windows as they tend to interfere with their work. You can run the software in “Fast Mode” and configure the number of threads. “Sub Scrapers” mean every source. For example, Google, Bing, Google Maps, etc are Sub Scrapers. Then you should select the number of “threads per scraper“. This means how many keywords you would like to process at the same time per website/source. For example, if I select 3 sub scrapers and 2 threads per scraper, this would mean that the software would scrape Google, Bing and Google Maps at 2 keywords per website. So, the software would simultaneously scrape Google for 2 keywords, Bing for 2 keywords and Google Maps for 2 keywords. This scraper consumes a fair amount of CPU and processing power so it is recommended to keep your threads relatively low, unless you are running your software on a powerful Windows VPS or a dedicated server or maybe even a gaming laptop. You should really only be using the “integrated web browser” if you are using a VPN such as Nord VPN or Hide my Ass VPN (HMA VPN). I do not recommend VPNs as they tend to be unreliable. The “Delay Request in Milliseconds” helps to keep the scraping activity relatively “human” and helps to avoid IP bans. You can also “delete results without emails“. The software will not save data for websites that do not have emails.

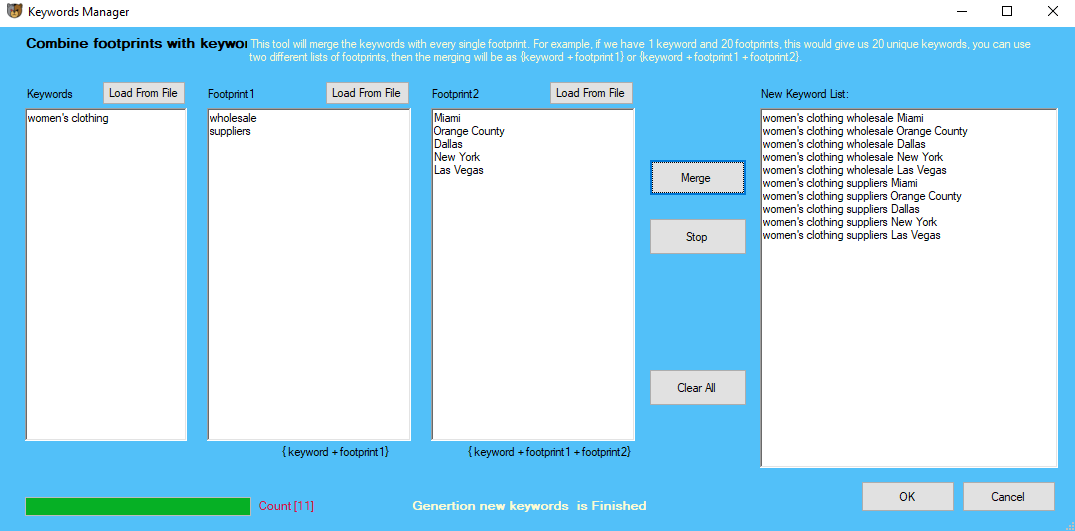
12(b) Configuring your Footprints List
You can combine your keywords with up to 2 footprints. Under the keywords section, click on “Add Footprint”. A new window should open where you will be able to enter your keywords and footprints. You can use the footprints area for scraping niche-related websites that accept guest posts for your website’s off-page SEO and link building. Inside the software file, we have included our very own list of footprints for finding guest posting opportunities. You can also use the footprints list for generating more targeted local keywords. For example, you could have Women’s Apparel (keyword) + Wholesale (Footprint 1) + California (Footprint 2). Inside Footprint 1 you could add words like wholesale, suppliers, distributors and inside footprint 2 area, you can add different cities such as Miami, New York, Los Angeles, Beverly Hills, Orange County, etc. Once you merge your keywords with your footprints, the software will transfer the new keywords to the main keywords field.
13(a) Running the Scraper (invisible mode)
Once your settings are configured, this is how the software should run.

13(b) Running the Scraper (visible mode)
This is how the scraper looks like when it is running in a visible mode.
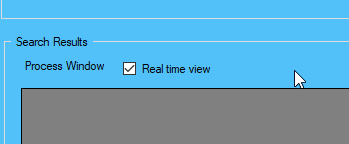
13(c) Real Time View of the Process Window
You can enable or disable the real time view process window. By disabling this option, you will potentially save some CPU and RAM as the real time view interfact can hog up computer resources. You can enable and disable this option in real time.
14 Email List Cleaner
Once the software has finished scraping your data, the next step would be to clean the entire email list according to your filter. At the bottom of the software, click on the pink button titled “Email List Cleaner“. Let me give you a quick run through of what each filter means:
- “Email Must match Domain” – this is a filter to filter out all the generic and non-company emails such as gmail, yandex, mail.ru, yahoo, protonmail, aol, virginmedia and so on. A lot of website owners put their personal emails on the website and social media. This filter is especially helpful for complying with the GDPR and similar data and privacy laws.
- “Only Save One Email per Domain Name” – some domains / websites have a couple of e-mails, one for customer service, one for marketing, one for returns and so on. This option will save only one email as you would not want to contact the same company many times. This is your spam reduction/control filter if you will.
- “Remove the Duplicated Emails” – by default, the scraper will remove all the duplicate emails. This is a precautionary filter.
- “Enter a list of keywords that part of the email must contain (either in the username or the domain name” – this should be your list of keywords that you would like to see in the email. For cryptocurrency sites, I would want to see keywords such as crypto, coin, chain, block, finance, tech, bit, etc. However, as was the case with the domain filter above, not all emails will necessarily contain your set of keywords.
- “Enter a list of keywords that the e-mail username must contain” – here our aim is to increase the relevancy of our emails and reduce spam at the same time. For example, I may want to contact all emails starting with info, hello, sayhi, etc.
- “Enter a list of keywords, symbols or characters that the e-mail MUST NOT contain” – this is a filter to weed out spam emails and honey traps. For example, it is obvious that we would have a non-functional email if we have any of these characters inside it: !”£$%^&*()_+=
14 b) Email List Cleaner – Export Data vs. Export Emails
Once you have cleaned your email list, you can export all the data and also Export Emails in a separate file. Usually, it is a good idea to “Export Emails” if you intend to use email addresses for e-mail or newsletter marketing. The emails will be saved in a .csv file, one email per row. This makes it very easy to copy and move emails. DO NOTE: YOU CAN ALWAYS IMPORTED YOUR ORIGINAL SCRAPED DATA AND CLEAN IT. THE SOFTWARE DOES NOT AUTOMATICALLY APPLY THESE EMAIL FILTERS JUST IN CASE YOU WANT TO CHANGE SOMETHING AT A LATER STAGE. MAKE SURE TO SAVE THE FILTERED EMAILS USING A SLIGHTLY DIFFERENT NAME WITHOUT REPLACING THE MAIN FILE.
15 a) Locating your data scraping results folder
As I mentioned previously, the software will automatically create a results folder for every project using the project name. Inside that folder, you will find the entire set of scraped results titled using your project name.

15 b) Opening your Excel Files
Sometimes, double clicking on an Excel .CSV file may not open it. Here is what you should do. Open Excel, click on “Data” tab and select “From text/CSV”, navigate to the folder containing the scraped data.

15 c) Exporting Just Emails
As I mentioned earlier, when you click on the “Email List Cleaner” pink button at the bottom of the main GUI, you can export all the data in a standard Excel .csv file or you can export just all the emails (one email per row). It is helpful to export just the emails if you plan to use the scraped data just for newsletters and emails.
16 Resuming your previous search in case the Scraper closes or crashes unexpectedly
In case the software is closed unexpectedly or crashes for some reason, you will be able to resume the previous search before the app crashed. Just re-open the software and select the “Complete Previous Search” checkbox next to the green start button. The software will resume the previous search right before the software crashed or closed unexpectedly.
17 Adding your Facebook and LinkedIn login details
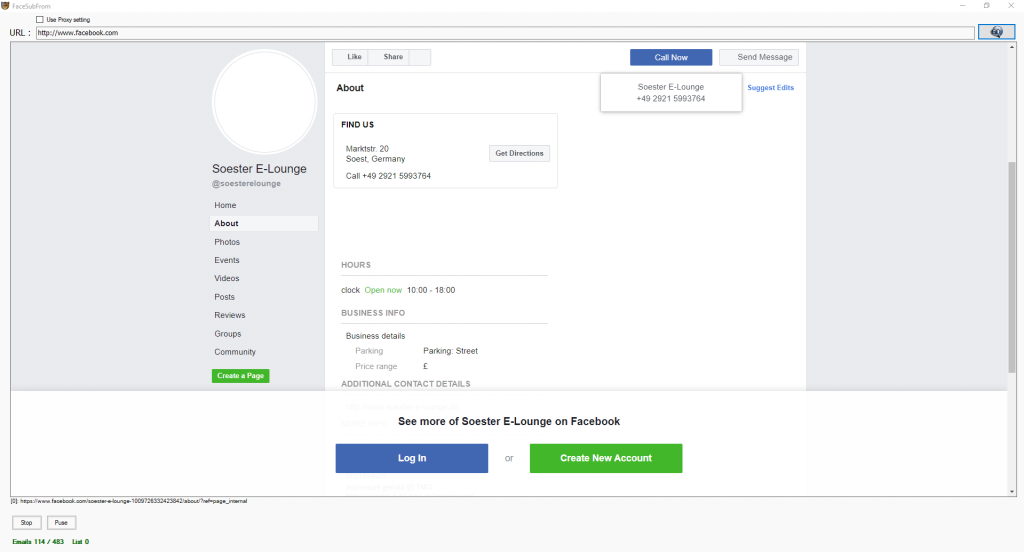
When the email extractor scrapes websites from the search engines, to get the contact data from a website, the software would check to determine if it can find all the information it is looking for directly on the website. However, if the website scraper cannot find some contact information on the website, it will proceed to check LinkedIn, Facebook, Twitter and Instagram for the missing contact details. LinkedIn and Facebook tend to block/disallow access to the company pages where all the data is stored, unless a person is logged in. It is therefore important that you enter your login details for LinkedIn and Facebook so that the software can scrape these two social media networks too as they contain a lot of valuable contact information. On the main GUI, click on the “More Settings” option, then navigate to “Save & Login Settings“. Go down to the Accounts section and enter your login details. Do not forget to click on “Update”. The software will now use your login details to access Facebook and LinkedIn.
TWITTER AND FACEBOOK SCRAPING: SCRAPE COMPLETE BUSINESS DATA FROM LEADING SOCIAL MEDIA SITES
By default, the search engine scraper will scrape business data from the website sources that you specify in the settings. This may include Google, Google Maps, Bing, LinkedIn, Yellow Pages, Yahoo, AOL and so on. However, it is inevitable that some business records will have missing data such as a missing address, telephone number, email or website. In the speed settings, you can choose either to scrape Facebook in case emails not found on the target website OR Always scrape Facebook for more emails. You can also scrape Twitter for extra data. Inside the Save and Login Settings tab, you have the option to add the login details for your Facebook account.
The website scraper is going to access your Facebook account using your local IP with delays to emulate real human behaviour. It is therefore important that you do not run a VPN in the background as it can interfere with your Facebook account. Sometimes, Facebook will not ask the bot to login and display all the business information whilst on other occasions, Facebook will ask the scraper to login in order to view a business page. The search engine scraping software is going to add all the target websites to a queue and process each website at set intervals to avoid bans and restrictions.
Troubleshooting: Common Problems and how to resolve them
Random Pop Up Windows
Sometimes, you may notice random pop up windows. These are just website generated messages. Just click ok and close them all. They do not interfere with the scraping process. Our devs are working on making the pop ups close automatically.
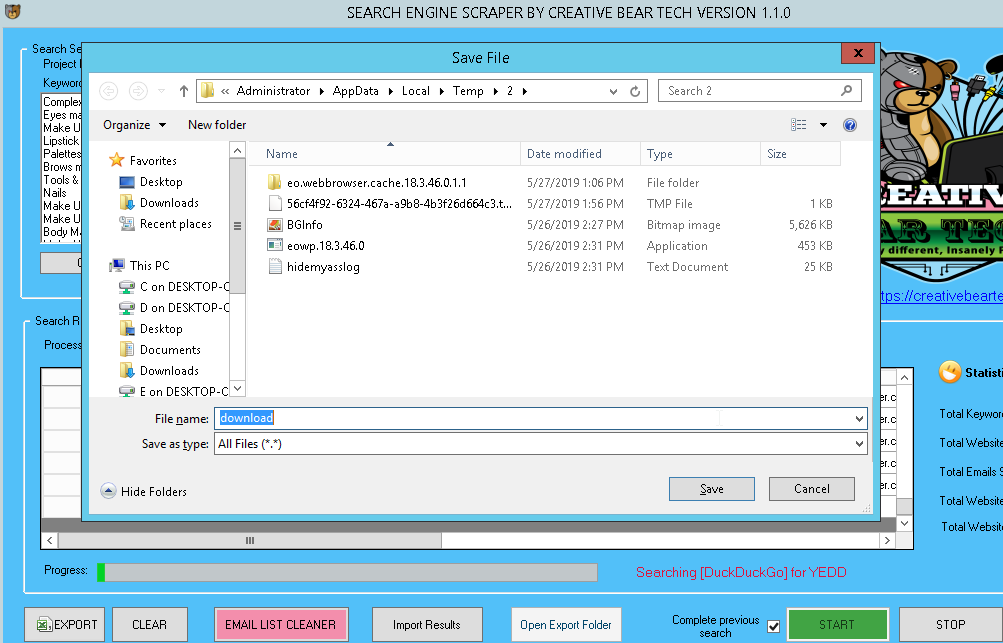
The website scraper tries to save a file from a website
Sometimes, the website scraper will try to save a file from a website onto your local disk. Just click on cancel whenever this happens. Please note, this will not accept the scraping. Our devs are looking for a solution to get the website scraper to automatically close the windows.
Updates to the Tutorial Based on the Software Updates
February 2020 Update: Version 1.1.5 Released
In this version, the website source html has been updated. This update has focused on adding a separate Facebook scraper that would work using the local IP with delays to emulate real human behaviour. If a scraper does not manage to find some form of data on a website then it will go to the site’s Facebook Business Page and try to scrape the missing data from that page. Do note: sometimes Facebook requires you to login in order to view a business page whilst on other occasions, it does not require you to login. It is highly recommended that you add your Facebook credentials inside the scraper to maximise your success rate.
November 2019 Update: Version 1.1.4
- Updated Google Maps scraper
- Simplified The footprints tool, merge the keywords with every single/multiple footprints.
- Add public proxies scraper tool, auto-check and verify the public proxies, automatically remove non-working proxies and scrape new proxies every X number of minutes.
- Scraping business name, Add the name of the business name to our results.
- Add an option to disable the real-time view of results, this option will reduce the consumption of processing power.
- Enhanced auto resolving the captcha issue
September 2019 Update: Version 1.1.3
In this update, a new feature has been added to the Search Engine Scraper that allows you to disable logging. In very simple terms, prior to this update, the website scraper would automatically collect information from each scraping action and would store that information inside a “log” folder. This had the tendency to really slow down the software. Now you have the option of disabling logging. Simply go to “more settings -> speed settings” and then untick “enable application activity log” and “enable individual threads activity log”. By unchecking these two options, you will significantly speed up the scraping progress. I am currently running the website scraper on a moderately powerful Windows VPS with the following specs: WIN-8-16GB RAM, ostype: win8 CPU Cores: 8 x, RAM: 16384 x MB, Network Port: 1000Mbps, OS: Windows Server 2012 R2 Standard Datacenter. I am using the previous version of HMA VPN PRO with timed out IP change and I am also using XEvil captcha solving software. I am able to run the software at 4 subscrapers and 5 threads per scraper. In just 24 hours, I managed to scrape over 4,000 websites, which is a four fold improvement in speed following this update.
July 2019 New Feature: Creative Bear Tech Manager
Inside the software folder, instead of running the standard “CreativeBearTech.exe” file, you can run “CreativeBearTechManager.exe“. By running the CreativeBearTechManager.exe file, the search engine scraper will keep on working despite any crashes or errors. This feature will add a lot of armour to the search engine scraper and allow it to operate even in the most adverse conditions.

Upcoming Updates
TURBO SPEED SETTINGS
The Problem: It has been brought to our attention by many users that when using a large keywords list, a lot of the time, the scraper skips duplicate websites. This appears to be the case for keywords that are closely interrelated. For example, if you search for bitcoin and then bitcoin news, bitcoin price, bitcoin blog, bitcoin mining, bitcoin miners, bitcoin mining software, you would get a lot of duplicates and the scraper would waste a lot of time and resources in skipping duplicate sites instead of finding new ones.The Solution: under the “Speed” settings, we are going to add a smart performance option/ Turbo Speed option that will enable a user to “[icon of a clock] [check box] Skip the processing of a keyword if no results have been found after [number] of pages/SERPs (recommended for increasing the scraping speed)”. This setting will significantly increase the scraping speed by preventing the web scraper from processing and cancelling duplicated websites.
MAGIC KEYWORD GENERATOR
The Problem: coming up with relevant keywords for scraping takes a lot of time, energy and external resources.The Solution: Magic Keyword Generator. This magic keyword generator would be available under the keywords text field by way of a button “Magic Keyword Generator”.
Inside a separate window, we are going to have the following:
Related Searches Keyword Ideas from Search Engines
“[Icon of a Magic Wand] [check box] Automatically generate keywords by getting related keyword searches from the search engines”.
“Select the search engines from which to get keyword ideas from related searches: [check box] Google [check box] Bing [check box] Yahoo [check box] Yandex [check box]”Crawling Depth [number]”
“Maximum Number of Keywords to Extract (0 unlimited)”
Keywords from Website Meta Titles
“[Icon of a Magic Wand] [check box] Automatically generate keywords by grabbing website meta titles”.
“Maximum Number of Sites to crawl”
“Maximum Number of Keywords to Extract (0 unlimited)”
The idea behind these options is that we would allow a user to generate niche-related keywords on auto-pilot by entering their root keywords. The website scraper would take take those keywords and run search engine searches and grab related keywords from 1) Related Searches Keyword Ideas from Search Engines AND/OR Keywords from Website Meta Titles. This would help a user to automatically generate their own niche-targeted list of popular keywords.Under this section, we will include the following options: “[check box] skip keyword suggestion that have the root keyword”, “[check box] skip keywords longer than [number] words”
Ideas for Future Updates
PRIVACY AND PROXIES
PUBLIC PROXIES
- Under the Proxies tab, we should add two options: 1) Use Private Proxies and 2) Use Public Proxies. By checking one or the other option, the app would know what proxies to use. If a user ticks the public proxies option, the software should automatically search for new proxies, delete non-working proxies, etc on auto pilot without requiring any input from the user.
- When clicking on the “Public Proxies” button on the main GUI, we should also add one check box: Use Public Proxies. If a user checks this option, the software will also automatically check the Use Public Proxies on the Proxies tab inside the settings. This will help to clear up any confusion and speculation from the user’s side. Inside the Public Proxies window, there are no options to control the public proxy sources. We can either keep everything as is and constantly add new public proxy sources with each update or we can allow the user to add their own public proxy sources. Also, we should have some form of an option to decide how many proxies a user wants to use.
- Scraping via a TOR browser. This is where inside the proxy settings, the app would simply connect and scrape using the TOR browser. [Admin: Dismissed. We have enough privacy/anonymity settings already. The TOR browser will not provide with a big advantage as it has a limited number of IPs and most search engines and website platforms can detect TOR sessions.]
- Scraping using Google Chrome Incognito window. [Admin: Dismissed. We have enough privacy/anonymity settings already.]
- Both options would be available by way of check boxes under the proxies tab. [Admin: Will be added in the next update]
- Under the public proxies tab, the app should have an option to auto check and verify the public proxies every X number of minutes (make sure that they are working), automatically remove non-working proxies and scrape new proxies every X number of minutes OR when the total working proxy number falls below X number of proxies. As well as allowing the user to upload and enter their own public proxy sources, we can have a list of ALL proxy source urls and the user can simply check using checkboxes which proxy sources they would like to use. The idea here is that the app will constantly monitor the proxies by removing non-working ones and scraping and adding new ones every so often to ensure that the app has enough proxies to run on at all times.
KEYWORD TOOL
- We can have an integrated keyword tool. In the field where a user enters their keywords, we could have a button “Search Keywords”. The app would then go to Google and search for that keyword and pick out all the suggested keywords and automatically add them to the keywords list to scrape. The idea is to save a novice user some time from having to think of many keywords for running their searches.
FOOTPRINTS OPTION
- The Footprints function should be simplified. Once a user opens up the footprints button, the app should simply give them a field to enter their own footprints inside a pane or upload a file. Next to the pane, we should have a check box to “Combine footprints with keywords”. The app would then merge their keywords with every single footprint. For example, if we have 1 keyword and 20 footprints, this would give us 20 unique keywords: root keyword + footprints. The idea here is to save a user time and effort. For example, the footprints section could be used to search for guest posting opportunities or whatever a user likes. (IMPLEMENTED)
SEARCH RESULTS PANE
- We could add an option to disable the real time view of results / disable GUI to reduce the consumption of processing power. We can simply add a check box with something along the lines of “Disable GUI for faster speeds”.
- Inside each column name i.e. url, email, website, address we should add a check box so that a user can select exactly what data to scrape. And in the first column we could have one checkbox to select all or select none.
- We should add the name of the business name to our results. We can get this via Facebook business page.
SPEEDS AND THREADS
- We could add an option to automatically change the thread numbers if the CPU usage exceed X% and ram exceeds X%. We could allow the user to enter / select any values they want. This is a good way to ensure the stability of the app.
DOMAIN FILTERS
- We could add an option to “Skip subdomain sites” as those tend to be web 2.0 and contain a lot of spam. This could allow us to save time and processing power.
EXTRA SCRAPERS / DICTIONARIES
- We could add Instagram to the list. However, the specifics of how Instagram works are different to other sources. We should add some simple options under Instagram drop down whether to search for users or hashtags on Instagram or both. We should also add an ability to login / add login details to an Instagram account under the last tab inside the settings.
ADDING ACCOUNTS UNDER THE LAST SETTINGS TAB
- We should also add a field for adding a private proxy that will tie that account. This will ensure that the user will always access social media accounts through one private proxy. Perhaps it would be a good idea to all a user to enter their accounts inside a plain text pane in a format like username:password:proxy:platform (platform would be our shortcode that would identify the social network. The could be LinkedIn, Facebook, Twitter. This would make it quicker to enter accounts. If a user enter more than 1 account. The app could switch between accounts every X number of minutes.